How to set up WSL and run Linux commands on Windows
Today in this article, we shall see how to How to set up WSL on Windows and run Linux commands on Windows machines.
I shall be listing few simple steps which can be used to configure. I have used Windows 10 machine to showcase this feature.
What is WSL?
WSL is Windows Subsystem for Linux.
It lets developers run Linux environments directly on Windows without the overhead of virtual machines or extra setup.
Once configured for WSL, you get support for all command-line tools, utilities, and applications.
Example- Ubuntu command line utilities including bash, ssh, git, apt
Set up WSL in Windows
Please follow below basic steps.
Step 1: Run Powershell
Run Powershell in Administrator mode and run the below command
Enable-WindowsOptionalFeature -Online -FeatureName Microsoft-Windows-Subsystem-Linux
If not used as admin mode might get below error,
“Enable-WindowsOptionalFeature: The requested operation requires elevation.”
Step 2: Enable Microsoft-Windows-Subsystem-Linux
The above command will let you enable the WSL feature on the Windows machine.

The above command should take a few minutes for enabling this feature.

Please restart the machine for the configuration to be effective.
Step 3: Download and install Linux distros
Download and install supported Linux distros.
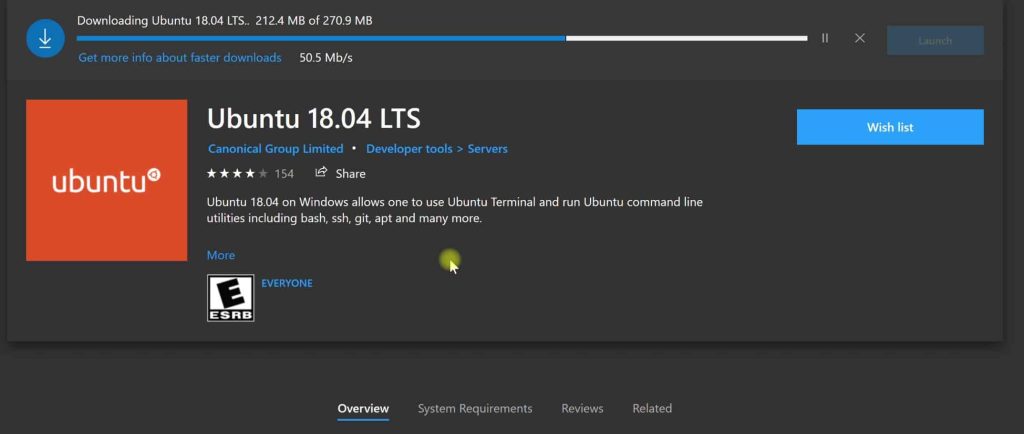
You can install it using the Ubuntu app available in the Microsoft store.
Ubuntu on Windows allows one to use Terminal and run Ubuntu command line utilities including bash, ssh, git, apt, etc.

Step 4: Set up default Unix user account and run apt commands
Once Ubuntu is installed successfully, please configure the default user account.

Please run the below commands to get the latest updates if any,
> sudo apt-get update

> sudo apt-get upgrade
That’s all, you are all set to use the Linux command on the window machine.
Do you have any comments or ideas or any better suggestions to share?
Please sound off your comments below.


Comments
Post a Comment